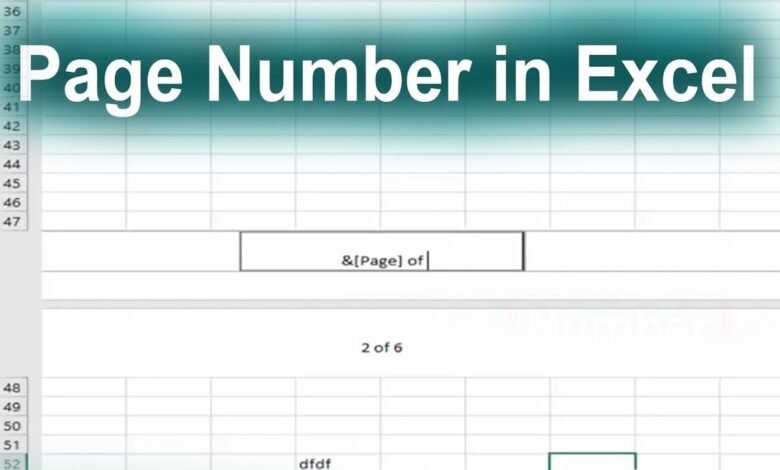
Discover the magic of adding page numbers to your Excel spreadsheets with ease. Excel stands tall as the ultimate tool in data management, and page numbers are its unsung heroes. Picture yourself navigating through rows and columns of data, seeking a specific section. Page numbers serve as guiding beacons, leading you to your destination effortlessly. Follow these simple steps to unlock the power of page numbering in Excel. From financial reports to project plans, page numbers enhance the organization and professionalism of your work. Embrace this newfound skill and elevate your Excel game to new heights.
Add Page Numbers
Excel is the most powerful tool for organizing and analyzing data in spreadsheets and statistics. However, many users want assistance adding page numbers to their Excel projects amidst the sea of cells and formulae. But don’t worry. We will start on a trip to solve this enigma and discover the hidden treasure of page numbering in Excel.

Why Add Page Numbers in Excel?
Picture yourself carefully going over a giant Excel spreadsheet and navigating through several rows and columns of information. You must find a particular area or share your findings with your colleagues. Page numbers come in very handy in this situation. They serve as markers in the vast space of your spreadsheet. It guides you and your viewers to the desired spot precisely and effectively. To become a Google Docs expert, you must first see “How to Make a Line in Google Docs“.

Step-by-Step Guide
Let’s dissect it into manageable steps: Open your Excel document first. Next, locate the “Header & Footer” area by selecting the “Insert” tab. Select if you want page numbers in the header or footer.
Click on the appropriate section and select “Page Number” from the options. Customize the formatting if you wish, adjusting font size and style. Take a moment to preview your document and ensure everything looks as expected. Finally, save your changes and admire your newly numbered Excel masterpiece.
With these straightforward steps, you’ll add page numbers like a pro in no time! And you should go to “How to Find Your Laptop IP” if you’re genuinely interested in learning your laptop’s IP address.
Step 1: Open Your Excel Document
First, fire up Excel and open the spreadsheet that needs some numerical navigation. Whether it’s a budget tracker, project plan, or inventory list, ensure your document is primed and ready for the page numbering treatment.
Step 2: Navigate to the Header/Footer Section
Now, it’s time to delve into the depths of Excel’s toolbox. Head to the “Insert” tab snugly in the Excel ribbon. Within this tab, you’ll find the key to unlocking page numbering nirvana – the “Header & Footer” group. Please give it a click and watch as a world of customization options unfurls before your eyes.
Step 3: Select the Desired Header/Footer
With the header/footer section readily accessible, the moment of decision has arrived. Would you prefer the page numbers to be positioned in the header or at the bottom of your document? Before proceeding further., It takes a moment to contemplate this profound inquiry.
Step 4: Insert the Page Number Placeholder
Once you’ve chosen, it’s time to put pen to paper – cursor to screen. Position yourself in the header or footer section where you want your page numbers to reside. Then, with a flourish, click the “Page Number” button in the header/footer editing toolbar. Voila! Excel will dutifully insert a placeholder for your page numbers, ready to be filled with numerical goodness.
Step 5: Customize the Formatting (Optional)
The exciting part is about to begin: updating your page numbers to reflect your style. Use the formatting choices available in the editing toolbar for the header and footer. The options are endless regarding changing the font & size and adding colour to your spreadsheet.
Step 6: Preview and Adjust
With your page numbers in place and looking sharp, it’s time for a test run. Take a moment to preview your document in the print layout view. This will give you a sneak peek of how your page numbers will appear when your spreadsheet hits the printer.
Step 7: Save Your Changes
Last but not least, remember to save your masterpiece. Whether sharing it with colleagues or simply basking in the glory of your organized data, keep your Excel document to preserve those precious page numbers for posterity.
Conclusion
In summary, becoming proficient in incorporating page numbers within Excel imparts a touch of professionalism to your spreadsheets. It’s akin to adding the finishing stroke to a painting, bringing cohesion and clarity to your data.
With page numbers in place, traversing through your information feels as effortless as sailing on a tranquil sea. Embrace this newfound capability and witness your Excel documents’ metamorphosis into refined work pieces. Whether you’re compiling financial reports or organizing project data, page numbers enhance the coherence and accessibility of your work.
So, without hesitation, integrate those page numbers and let your Excel expertise shine brightly in the digital landscape.
FAQs
Can certain pages be excluded from displaying page numbers in Excel?
Indeed it is. Excel allows you to exclude specific pages from displaying page numbers with ease. Customize the header/footer settings for the desired pages and bid farewell to unwanted page numbers.
Can I add additional text alongside the page numbers in Excel?
Of course! Excel lets you get creative with your page numbers by allowing you to include supplementary text in the header or footer section. Whether it's a title, a date, or a witty remark, the choice is yours.


